Ice dams pose a serious threat to Colorado roofs, particularly in mountain and Front Range communities with heavy snowfall and freeze-thaw cycles. Proper attic insulation, ventilation, and heat cable systems can prevent costly water damage from ice dam formation. Connect with Colorado roofing professionals who understand local climate conditions and can implement effective ice dam prevention strategies tailored to your home's specific needs.
Featured Contractors
View all →What Causes Ice Dams on Colorado Roofs?
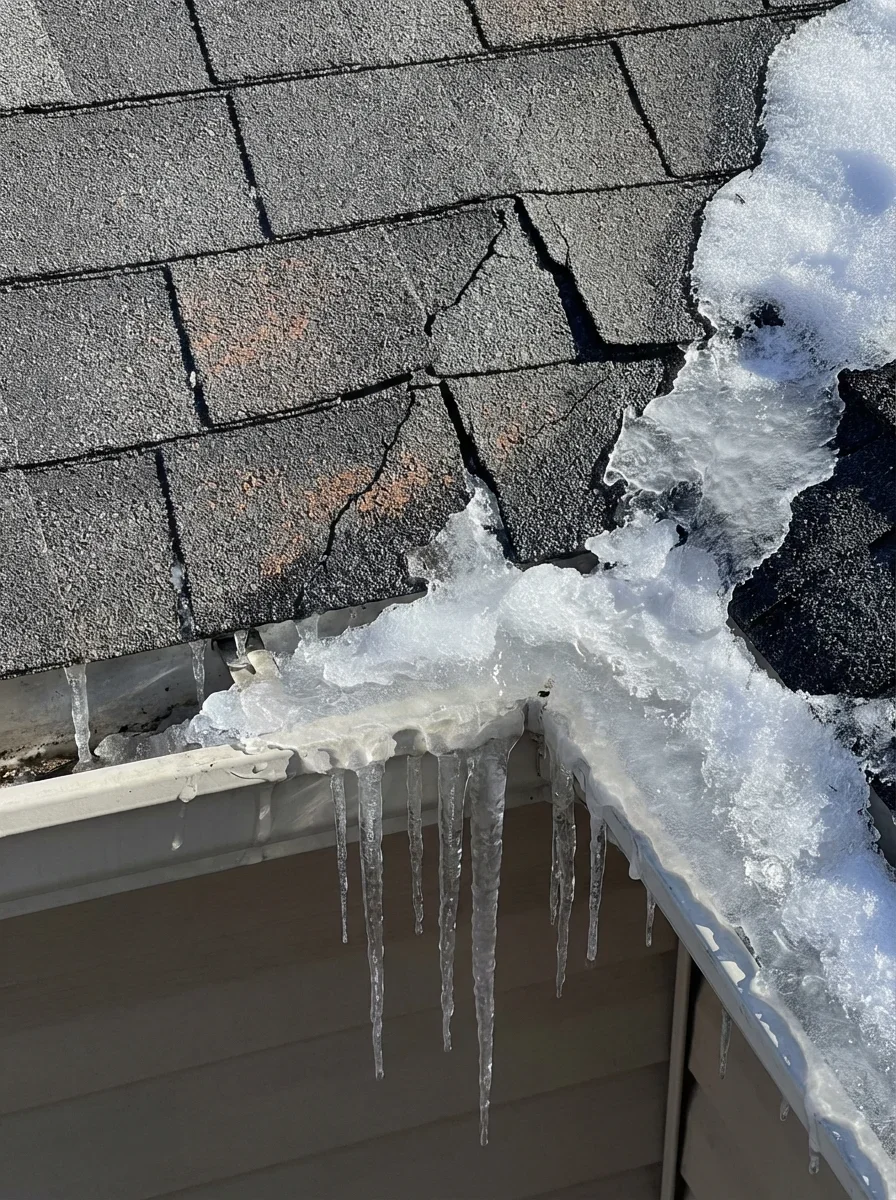
Ice dams form when heat escapes through your attic, melting snow on the upper roof sections. That meltwater flows down to the cold eaves, refreezes, and creates a barrier. More water backs up behind it, seeping under shingles and into your home.
Colorado's climate accelerates this cycle. Daily temperature swings of 40-60°F during winter mean your roof can experience multiple melt-freeze events in a single day — especially on south-facing slopes that bake in intense high-altitude sun.
Front Range homes in Denver, Aurora, and Lakewood see this pattern repeatedly from November through March.
Colorado's Unique Climate Challenges
Elevation amplifies the problem. At 5,280 feet in Denver, roofs absorb 50% more UV radiation than sea-level homes, creating faster daytime melting.
Mountain properties above 7,000 feet carry heavier snow loads — 65 psf or more requires extended ice dam membrane protection per Colorado building codes.[1]
Watch for these warning signs:
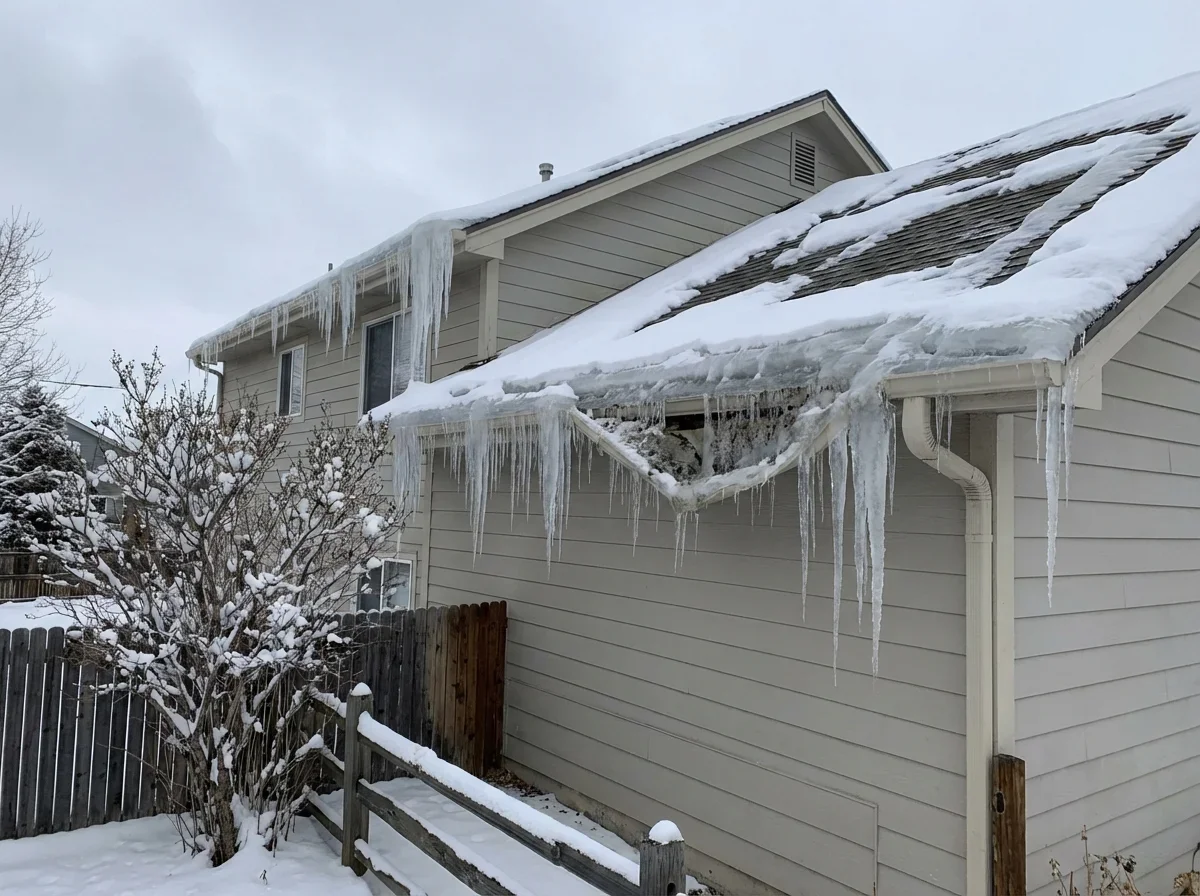
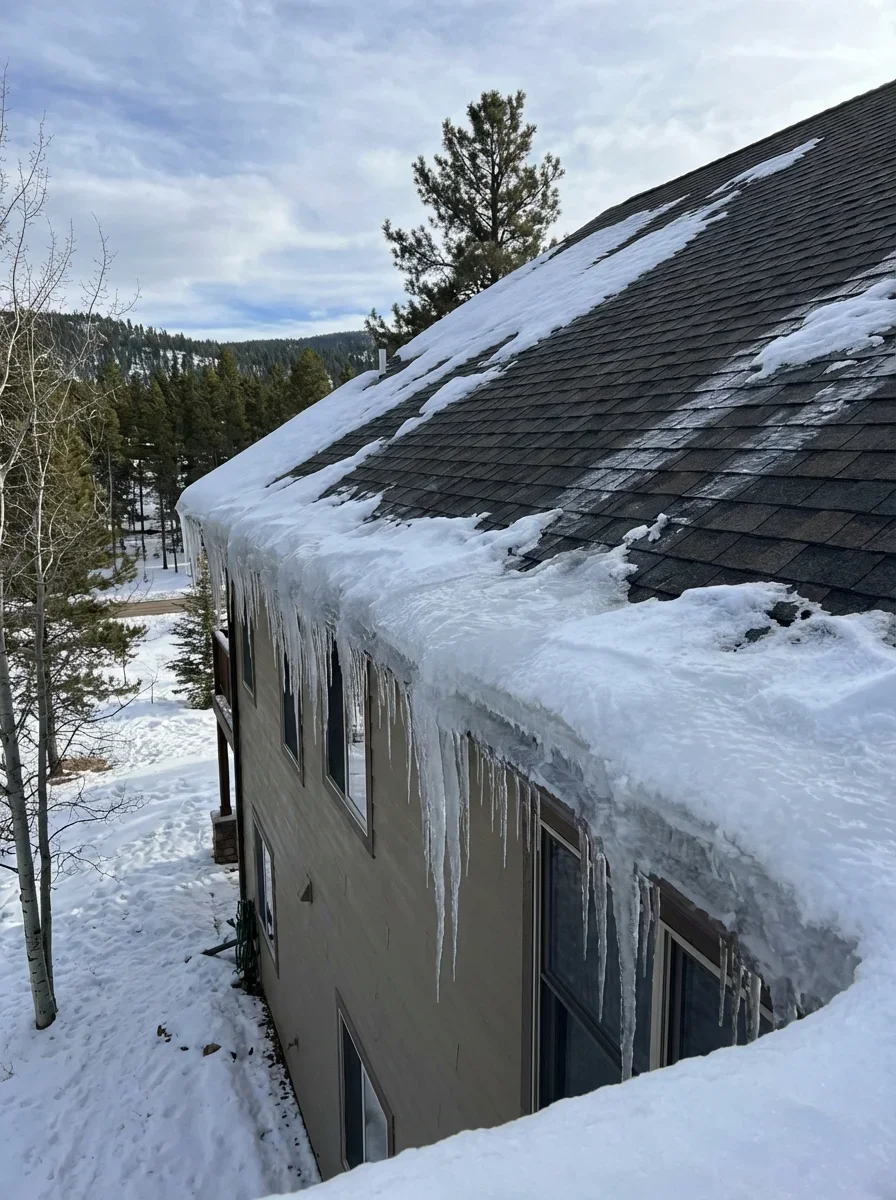
- Icicles exceeding 6 inches (small icicles are normal; large formations signal heat loss)
- Water stains on interior ceilings or exterior walls
- Ice buildup in roof valleys or behind chimneys
- Gutters pulling away from the fascia under ice weight
Older neighborhoods in Fort Collins and Boulder often have inadequate attic ventilation. Homes built before 1990 rarely meet current 1:150 airflow ratios.
Catching it early matters. A $2,000 ventilation upgrade beats a $12,000 water damage claim plus emergency ice removal every winter.
What Does Ice Dam Prevention Cost in Colorado?
Prevention costs vary by method and home size. Here's what to budget for a typical 2,000-square-foot home:
| Prevention Method | Typical Cost Range | Longevity |
|---|---|---|
| Heat Cable Installation | $800 - $2,500 | 10-15 years (seasonal use) |
| Attic Insulation Upgrade (R-38 to R-49) | $1,500 - $4,000 | 40+ years |
| Ventilation Improvements (ridge + soffit) | $1,200 - $3,500 | 25+ years |
| Air Sealing + Full Prevention Package | $4,500 - $8,000 | Permanent solution |
| Emergency Ice Dam Removal | $400 - $1,200 | Temporary (per event) |
Heat Cable Installation Costs
Basic heat cable runs $4-$8 per linear foot installed. A 150-foot installation for a ranch home costs $800-$1,200.
Complex rooflines in Colorado Springs or Pueblo with multiple valleys run $1,800-$2,500. Add $200-$400 for professional-grade roof sensors and controllers.
Ventilation and Insulation Upgrades
Ridge vent installation costs $8-$12 per linear foot. A 40-foot ridge runs $400-$600 including labor. Soffit vent upgrades add $600-$1,200 depending on accessibility.
Blown-in insulation costs $1.50-$3.00 per square foot. Bringing 1,200 square feet of attic from R-30 to R-49 runs $1,800-$3,600.
These upgrades qualify for energy efficiency tax credits and reduce heating costs 15-25% annually.
Emergency Ice Dam Removal Pricing
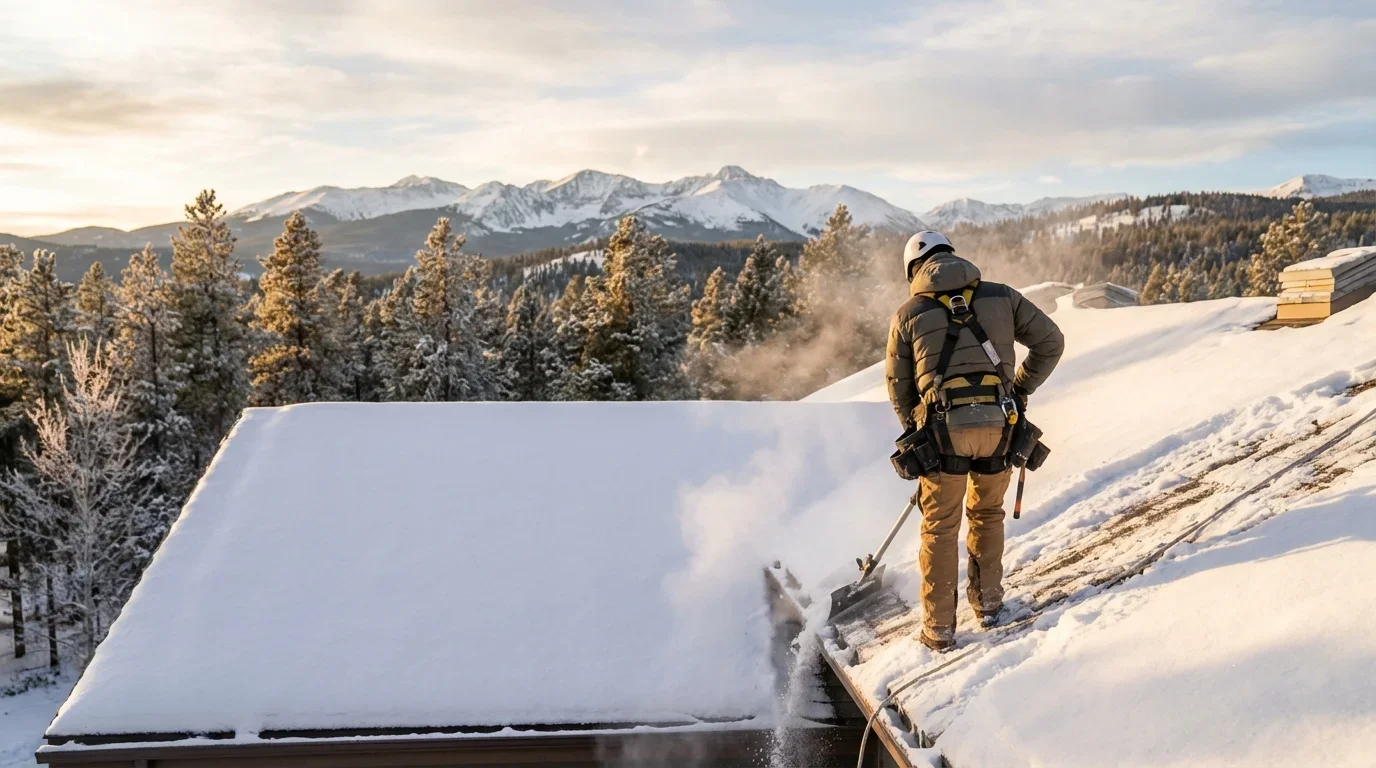
Emergency steam removal runs $400-$800 for standard single-story homes, $800-$1,200 for two-story or steep roofs. Never use hammers, heat guns, or calcium chloride — all damage shingles.
Professional steam melts channels safely without impact. This is reactive work. The dam will reform without addressing ventilation issues.
Prevention pays off quickly. A $3,000 ventilation upgrade eliminates $800 annual removal costs while protecting against $10,000+ water damage claims.
The Ice Dam Prevention Process
Prevention involves four components: inspection, ventilation, insulation, and supplemental heat cables. Most contractors follow this sequence to address root causes first.
Step 1: Attic Inspection and Heat Loss Assessment
A thermal imaging scan identifies where heat escapes. Common culprits: recessed lighting, bathroom exhaust fans venting into the attic, and gaps around chimneys.
The contractor measures current insulation depth (Colorado Zone 5 requires R-49 in attics) and checks for air leaks at the top plates.
Step 2: Ventilation System Evaluation
Proper ventilation requires balanced intake and exhaust. Soffit vents pull fresh air in, ridge vents expel hot air. The standard: 1 square foot of ventilation per 150 square feet of attic space.
Many Colorado homes have blocked soffit vents from blown-in insulation or insufficient ridge vent length. Contractors calculate net free area and recommend passive systems (ridge/soffit) or mechanical fans for difficult roof geometries.
Step 3: Insulation Upgrades and Air Sealing
Air sealing comes before adding insulation. Spray foam seals penetrations, then blown-in fiberglass or cellulose brings R-value to code.
This step delivers year-round benefits: lower heating costs and reduced ice dam risk. Timeline: 1-2 days for typical homes.
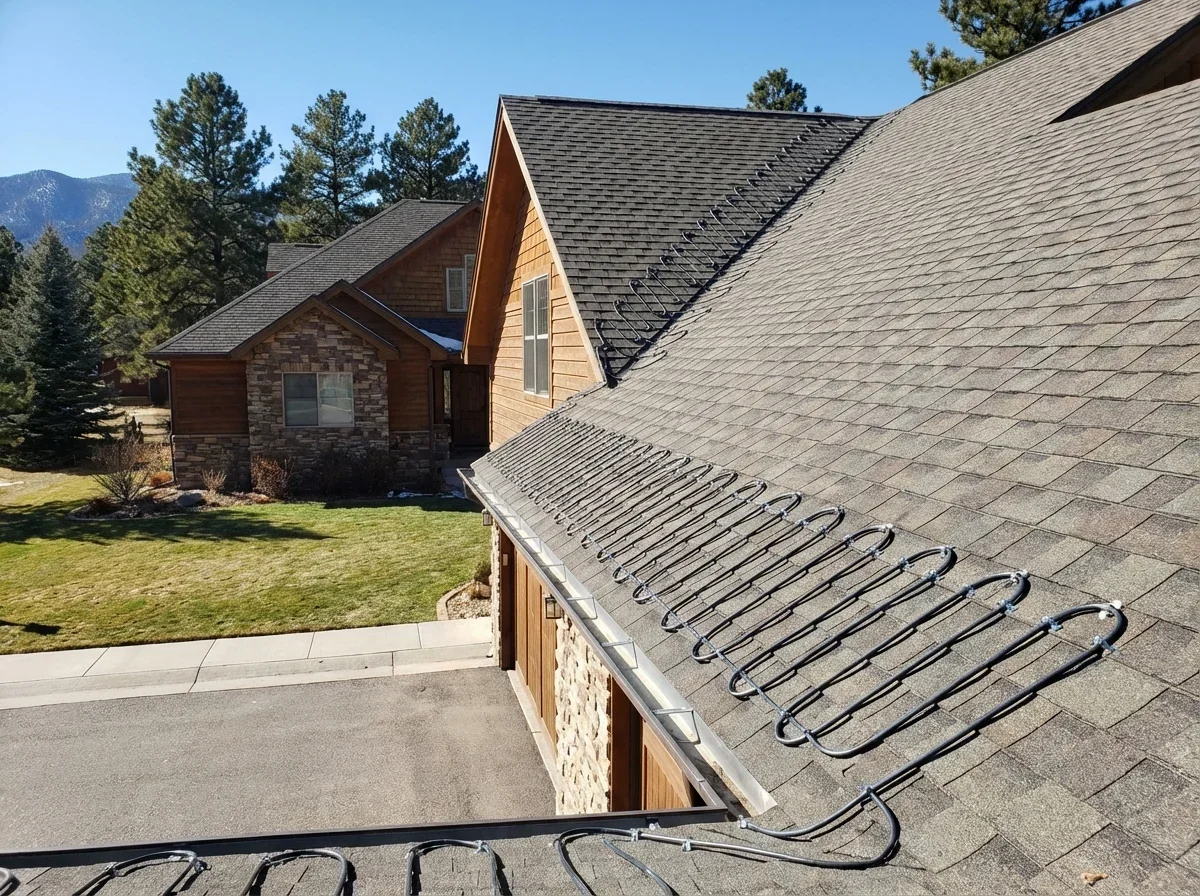
Step 4: Heat Cable Installation (If Needed)
Heat cables mounted in zigzag patterns along eaves create melt channels. They're not a permanent fix — they address symptoms while ventilation handles the cause.
Install them before the first snow in October. They draw 6-12 watts per foot and run on roof-mounted sensors or manual timers.
Timeline: Complete prevention work takes 2-4 days. Schedule upgrades in late summer or early fall before contractors book solid with roof snow removal emergencies.
How to Choose an Ice Dam Prevention Contractor
Colorado has no state roofing license, so municipal requirements vary. Denver requires a Supervisor Certificate. Other cities have different standards.
Use these criteria to evaluate contractors:
Questions to ask:
- "Do you carry workers' comp and liability insurance?" (Request certificates — never take verbal confirmation)
- "Will you perform thermal imaging and ventilation calculations?" (Guesswork wastes money)
- "What's your experience with Colorado's elevation zones?" (Mountain homes above 8,000 feet need different solutions than Front Range properties)
- "Do you install heat cables in compliance with manufacturer guidelines?" (Improper spacing voids warranties)
- "Can you show before/after thermal images from past projects?" (Visual proof beats testimonials)
- "What warranty covers the ventilation work?" (5+ years on installation, manufacturer coverage on materials)
Red flags to avoid:
- Contractors pushing heat cables without addressing insulation or ventilation (treating symptoms, not causes)
- Quotes without attic inspection (impossible to price accurately)
- Pressure to "install today before the next storm" (prevention work happens in fall, not during emergencies)
- No mention of roof inspection for existing shingle damage from previous ice dams
Denver, Arvada, and Longmont municipal building departments can verify contractor licensing status. Colorado Roofing Association (CRA) membership indicates industry engagement and continuing education.
Compare multiple bids that break out ventilation, insulation, and heat cables separately. The lowest price often skips critical air sealing.
Cross-reference with contractors offering gutter installation experience — they understand how drainage patterns contribute to ice dam formation.
Frequently Asked Questions
- Colorado Secretary of State. "Code of Colorado Regulations." https://www.sos.state.co.us/CCR/GenerateRulePdf.do?ruleVersionId=3067. Accessed April 08, 2026.
- National Weather Service. "Preventing Roof Ice Dams." https://www.weather.gov/grr/roofIceDams. Accessed April 08, 2026.
Related Articles
Need Help With Your Project?
Join 500+ homeowners we've helped